Friday, May 29, 2009

Recreating The Control Panel: Part 4

Almost there... the next thing I did was line up the joystick in the hole I had cut out. I just eyeballed it but I have a good eye and it looks like I got it dead-center. To help out with the process I installed the control panel overlay and sandwiched the joystick dustwasher in between the MDF/ABS panel and the overlay. All I had to do was center the dustwasher hole in the overlay.

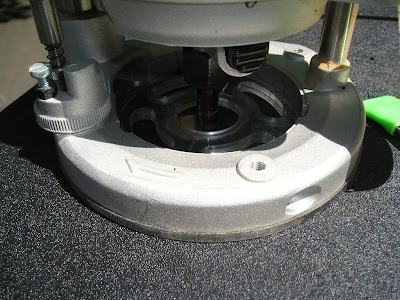
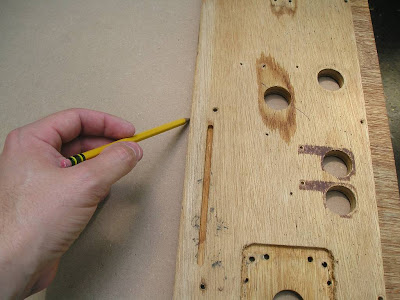
Once it was lined up I flipped everything over, made sure the joystick was square to the panel and then traced it with a pencil. Then, using my router set to a 1/4" depth I freehanded out the rectangle I just drew.

Not bad, eh? It will take some fine tuning with the 4 corner bolts in order to secure it and make sure it is perfectly centered in the plastic control panel overlay.

Next up - cutting the groove on the bottom which receives the metal latch thing on the front of the cabinet. It's hard to explain until you see it...

More later.

Thursday, May 28, 2009

Recreating The Control Panel: Part 3

Next up is the lamination process. The original Donkey Kong control panel is 9/16" thick to accommodate the t-molding which goes on the front edge. In order to get this thickness I decided to use a 1/2" piece of MDF and laminate it with a 1/16" piece of ABS plastic. This stuff is available in lots of different places (eBay and Amazon have it) and isn't too expensive.

The first thing I did was cut out a piece of the ABS plastic about 1/2" oversized all the way around:

I used my trusty contact cement to bond the plastic to the MDF:

I use a foam brush to apply the contact cement to both mating surfaces. I probably went a little overboard but it didn't make a difference - the MDF is porous so I wanted to be sure I had enough on there.

After waiting 20 minutes for the glue to dry I placed a scrap piece of MDF on top and used a cinder block to apply pressure in order to achieve a tight bond.

It worked! After about 10 more minutes I used my router (with the pattern bit again) to trim the ABS plastic flush with the panel. You can see what a clean job the router does - it came out perfect.

The next thing I had to do was trim around the button holes. I used a drill and a step bit to start and then when the hole was big enough I stuck the pattern bit in there and flush trimmed the button holes just like I did around the outside.

After that was finished I used my drill bit to drill out the 8 holes in the ABS plastic for the control panel overlay. Easy!

We are almost there. Next up is routing the recess in the back for the joystick and routing the groove for the front latch to rest in.

More later.

Wednesday, May 27, 2009

Recreating The Control Panel: Part 2

Next, I had to lay out the button locations and the holes for the control panel bolts which hold down the plastic control panel overlay. This part was simple. Using the old control panel as a guide, I placed a 1-1/8" Forstner bit in each hole and gave it a light tap with my rubber mallet to mark the center point of each button and the joystick hole.

Then, I used my drill to bore out the holes I just marked.

Once that was finished I installed the buttons I ordered in the holes I just drilled with the control panel overlay in place. I wanted to make sure the art would line up with the button holes and...

... this allowed me to layout the holes for the eight (8) control panel bolts that will secure the plastic overlay in place.

Finally, I removed the plastic overlay from the MDF and drilled out all the holes I just marked.

Next up - laminating the MDF panel and installing some components!

More later.

Tuesday, May 26, 2009

Recreating The Control Panel

As I mentioned in a previous post, Bender from BYOAC was kind enough to send me his old Donkey Kong control panel so I could make an exact copy. Even though I wanted to finish painting the cabinet over the long weekend, I decided to get this part of the project completed since I didn't have that much time to work and I also want to get the control panel back to Bender as quick as I can.

Here is what I started with:

This should have been very very easy but of course, the old control panel was made out of 9/16" plywood which Home Depot doesn't carry. In order to get the required 9/16" thickness I decided to use 1/2" MDF as the base and then laminate the top with 1/16" black ABS plastic.

The first thing I did was trace the outer shape of the control panel onto the sheet of MDF.

Then I cut it out with the jigsaw leaving about 1/8" around the edges.

After that was finished I used some double sided tape to secure the old control panel to the MDF and then cut the exact shape out using my router and a pattern cutting bit.

Next up - laminating the MDF panel I just cut out, mounting the joystick and a bunch of other fun stuff!

More later.

Monday, May 25, 2009

Memorial Day Madness!

As expected I didn't quite get as much done over the long weekend as I had hoped. We had plans on all three days so I was only able to work on the cab on Monday afternoon for 2 hours while my son napped. Instead of trying to paint the cab in a rush I ended up making the control panel. I took a ton of pictures and I'll try and do my best to explain the process.

More later.

Thursday, May 14, 2009

Even More Parts Are Here!!

Well, it has been a fun week of getting mail. Yesterday when I got home from work the Nintendo button holders I bought from a VAPS member ($12) had arrived. They would have been $37 shipped from Mike's Arcade so I decided to go the used route. No one will ever see them and they are original parts!

The shaft of the button will go through the hole in the metal and trip the microswitch lever. These things are pretty funky.

More later.

Wednesday, May 13, 2009

Some More Parts Are Here!!

Yesterday when I got home from work I had a package waiting for me! Last week I placed an order with Arcade Shop for the marquee, bezel art, 9/16" white t-molding and the instruction cards (taped upside down to the Plexiglas). Check it out:

The bezel and the marquee came with protective plastic coverings which is why they look a little "off" in the pictures.

I can't wait to get everything installed and this is extra motivation to get moving with this thing. Unfortunately, my schedule has been extremely busy and I haven't had time to work on the cabinet. I did put on a coat of primer last week (no pics yet) but I still have to go back and fill in some small imperfections with bondo and sand again. It is tedious! I expect to finish the painting over Memorial Day weekend. After that the rest should go pretty quick.

More later.