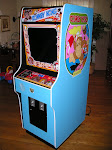
I was really lucky when I went to pick up this cabinet - the coin door was in excellent shape! It is the only thing on a Donkey Kong cabinet that you can't buy a reproduction of (to my knowledge) so in order to get everything looking factory fresh you have to find an original and restore it. The problem is that over time they tend to get bent out of shape due to people trying to break in and they all rust due to age and less than ideal storage conditions.
Check out the coin door that came with the cabinet (I still can't believe it was only $36!):
 As you can see, the paint is chipping all over the place and there is a considerable amount of rust. However, there are no dents! It is in great shape and once I strip off all of the old paint and rust I can prime and repaint it and the coin door will look brand new! I hope...
Here is a shot of behind the coin door:
 The original wiring harness is still there (I'm probably not going to use it) and if you look really close you can see the coin counter!
 The coin counter is set to 31,071 which means that while this cabinet was in service it made $7,767.75. Not too bad considering that amount is a quarter at a time! I'm going to look into resetting the coin counter for when I put the finished cabinet in my house so I can keep track of how many games I've played - it's a pretty neat feature.
The next pictures are close-ups of the actual coin mechs:

 There are not in great shape and the finish has completely worn down around the coin slot. I'm not sure if I'll be able to restore these to factory condition so I'm contemplating replacing them with similar looking coin mechs from Asahi Seiko. They look like this:
 Notice the coin catcher on the bottom is slightly different (the "U" shape vs. the "ear" shape on the original). I'm really undecided right now - they are expensive at $40 each but sure would look nice!
Here are some more pictures of my coin door (yeah, it's overkill but what else am I going to do with them?):


 More later.